How To Make Rope Protective Pad

How to make Rope Protective Pad


Materials for making - Polyester Web Sling Band(10 ton, 1 ton), 3mm bolt, nut, knife, gas burner, 2mm cord, grinder. 

Today, I'm blogging how to make rope protective pad because I need it for my 100m rope.

For me, It could make it without any problem cause I have an old protective pad which one of my team members already made it. Also, I have all the tools that are needed for making it in my office so only spent money for web slings.


Taking all the seams out that are connecting with two layers of 10 ton web sling so make it one layer and then cutting it proper size of length. 


and slightly burn each side of cutted web sling so it wouldn't be taken seams out. 
and make supporting rope stand using 1 ton web sling in order to make rope fixed while working. 
Approximate size for cutting is about 20~30cm and also slightly burn each side of slings.  it gonna to be folding into two then it become about 10~15 cm.


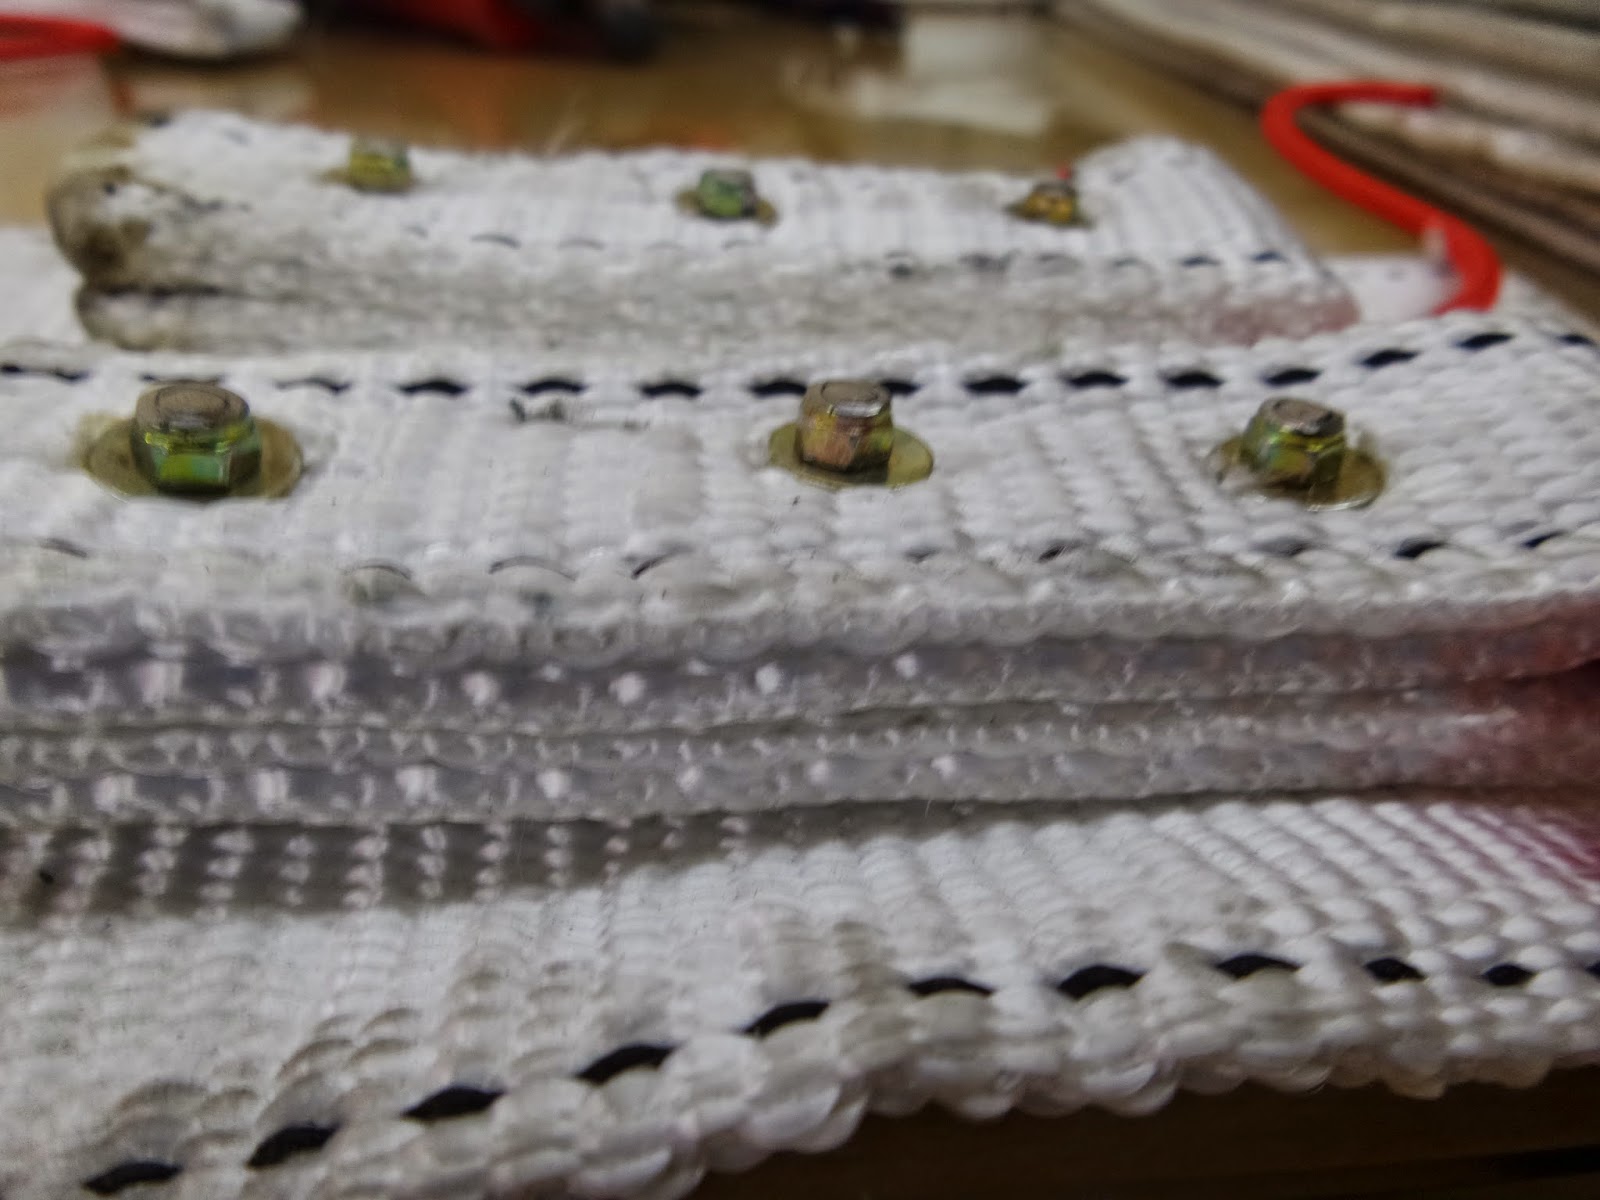
and make three wholes in a row with red-hot drill bit for fixing on 10ton sling with bolt and nut and put the 2mm cord between folded 1ton sling. 
and put its placement from the end of 10ton sling and locate two of it. 
Remain proper width between two of them because two rope should be fixed in that space.


Connect all the bolts and nuts in the six wholes and tighten up the screws firmly until holding it. It's better to make the bolt's head going downside of the pad, because we should cut it out  the rested pieces of bolts after screwing up with grinder.


and then, we should make another rope fixing code where the other side of what we made in advance. Cut a code about 30~40cm, and make that one side is 10cm longer than another side. then longer side would be winded a rope once more than another side so it will prevent the rope to move.


Lastly, I put my name on it so it would not be mixed with other teammates', I made 4 of these, that's enough to use because every teammates have on their own. If you have more creative idea to develop this rope protector please share with me!  
Good luck!


로프 보호 패드 만들기

로프 보호용 패드 만들기


재료 - 10t, 1t 타워크레인용 실링밴드, 3mm 볼트, 너트. 칼, 가스버너, 그라인더, 매직, 고정용 끈.

이번에 100m 로프를 구매한 기념으로 로프 패드를 만들기로 결정했다.
이미 만들어진 로프 패드를 보고 그대로 따라하는거라 그리 어렵지 않게 만들었다, 또한 사무실에 자작에 필요한 모든 장비가 있는 관계로, 공구상가에서 구입해온 자재비만이 지출되었다.

일단 패드의 가장 넓은 면은 10t 타워크레인용 실링밴드 두겹을 실밥을 튿어 한겹으로 만들어주고 적당한 길이로 재단. 


양 끝쪽에 잘라진 면들은 불로 살짝 녹여 실밥이 풀리지 않게 마무리를 해준다. 
그리고 1t 크레인 밴드로 로프를 고정할수 있도록 잡아주는 지지대를 만들었다. 
크기는 10~15cm 로 적당하게 잘라주고 이것도 양 끝쪽을 불로 녹여 마무리.


달궈진 송곳으로 로프를 고정해줄 지지대에 구멍을 미리 뚫어놓고 로프 고정에 사용될 끈을 미리 고정한 후 구멍을 뚫는다. 
로프 두개정도가 들어갈 넓이와 패드 끝에서 한 10cm정도 떨어진 지점에 지지대를 자리잡히고 같은지점에 세개의 구멍을 뚫어준다. 


로프를 고정할 끈도 로프를 묶어서 고정할 수 있는 적당한 길이로 재단하여 끝 부분을 불로 살짝 녹여서 마무리해준다.


미리 뚫어논 구멍에다가 아래쪽 방향에서 와샤-볼트, 윗쪽에 와샤-너트를 연결해준다. 그리고 규격에 맞는 스패너와 드라이버로 조여준다.


윗부분에 너트가 튀어나온 부분은 그라인더로 잘라주어 마감을 해야하는데, 그라인더 사용시 조심해야한다.


그리고 로프지지대 반대편으로 로프를 잡아줄 또다른 고정끈을 연결해주는데, 한 30~40cm 길이로 자른뒤 한쪽은 다른한쪽보다 한 10cm 길에 해주어야지, 나중에 로프를 고정할때, 한바퀴 더 감아주어 고정함으로써 패드가 로프사이에서 움직이는 것을 방지해준다. 


마지막으로 이름을 써서 다른팀원과 섞이는 일이 없도록 했다.
4개정도 만들었는데, 다른 팀원들도 각자의 것이 있으니 이정도면 충분히 사용할 수 있을 것 같다.


Rope Access Work_Constructing Sign Channel in CheongJu, Korea.

Constructing Sign Channel in CheongJu, Korea.


Working Tools - 36V Bosch Hammer Drill, 18V Bosch Hammer Drill(11MM, 6.5MM, 5.5MM Hammer Drill bits set), 11MM Semistatic Rope , 5.5MM, 6.5MM Nylon Nail Plug, Hammer, 12MM Strong Anchor, 2.5sq x 2C cable, 18V Bosch Impact Drill + Screw Driver Bit , SUS Pan Head Tapping Screw, Flexible Electrical Tubing, Cable snip, SUS Shaddle, Electrical Junction, Wire Nipper, Electrical Tape


In this time, we have a project to construct sign channel in apartment where residents have already lived.

By constructing LED sign channel on the side of apartment, they can increase the value of the building. 


When I arrived the working place with my teammate, Mr. Roh and Mr. Bae already finished the first place.
From the next day, we connected cables from channels to controller where is the rooftop.


Using flexible electrical tubing is the one way we have to do for outdoor cable when connecting cable to controller. so it can be stayed safely from harsh weather outside. 
and we used SUS shaddle and SUS screw for it wonldn't get rusty.


The most important task for industrial rope access is rigging the rope safely wherever we are.
Depends on which point and how to rig the rope is the main key to make safe working place.


Basically, we use 12mm strong anchor for rigging the rope with karabiner.


And also use a plastic eletrical junction to connect with DC cable from channel to AC main cable.


We suddenly met rain in the middle of construction.


So we had tea time for resting.


And make the gloves to dry...


Finally rain stopped at the afternoon.
starting again.


We drill the wall of apartment with 18v hammer drill in order to hanging the channel, connecting each cable from the each alphabet and remove the previous sign marked by paint.


At the end of constructing,  sunshine was to smile us with cheering. 
When you see the structure of this apartment, you could find how hard to do rope access work in this rooftop structure.


The point we have to rig the rope is too brittle styrofoam to do work.
So we had to use this section steel to protect the styrofoam structure.  


And lastly, we install a support and a pulley for winch.


When we are ready to conduct, we pull up each channels using a winch fixed at ground and people who are in the rooftop bring it up and bring it down one by one from rooftop.
and other team who hanging the rope construct each channel to the wall by drilling and fixing with strong anchors.


In the whole time, it is necessary to communicate with teammates from the rooftop and the ground in order to smoothly construct our tasks.

and last day of constructing, it's getting warm to work so we could finish our job smoothly and safely.